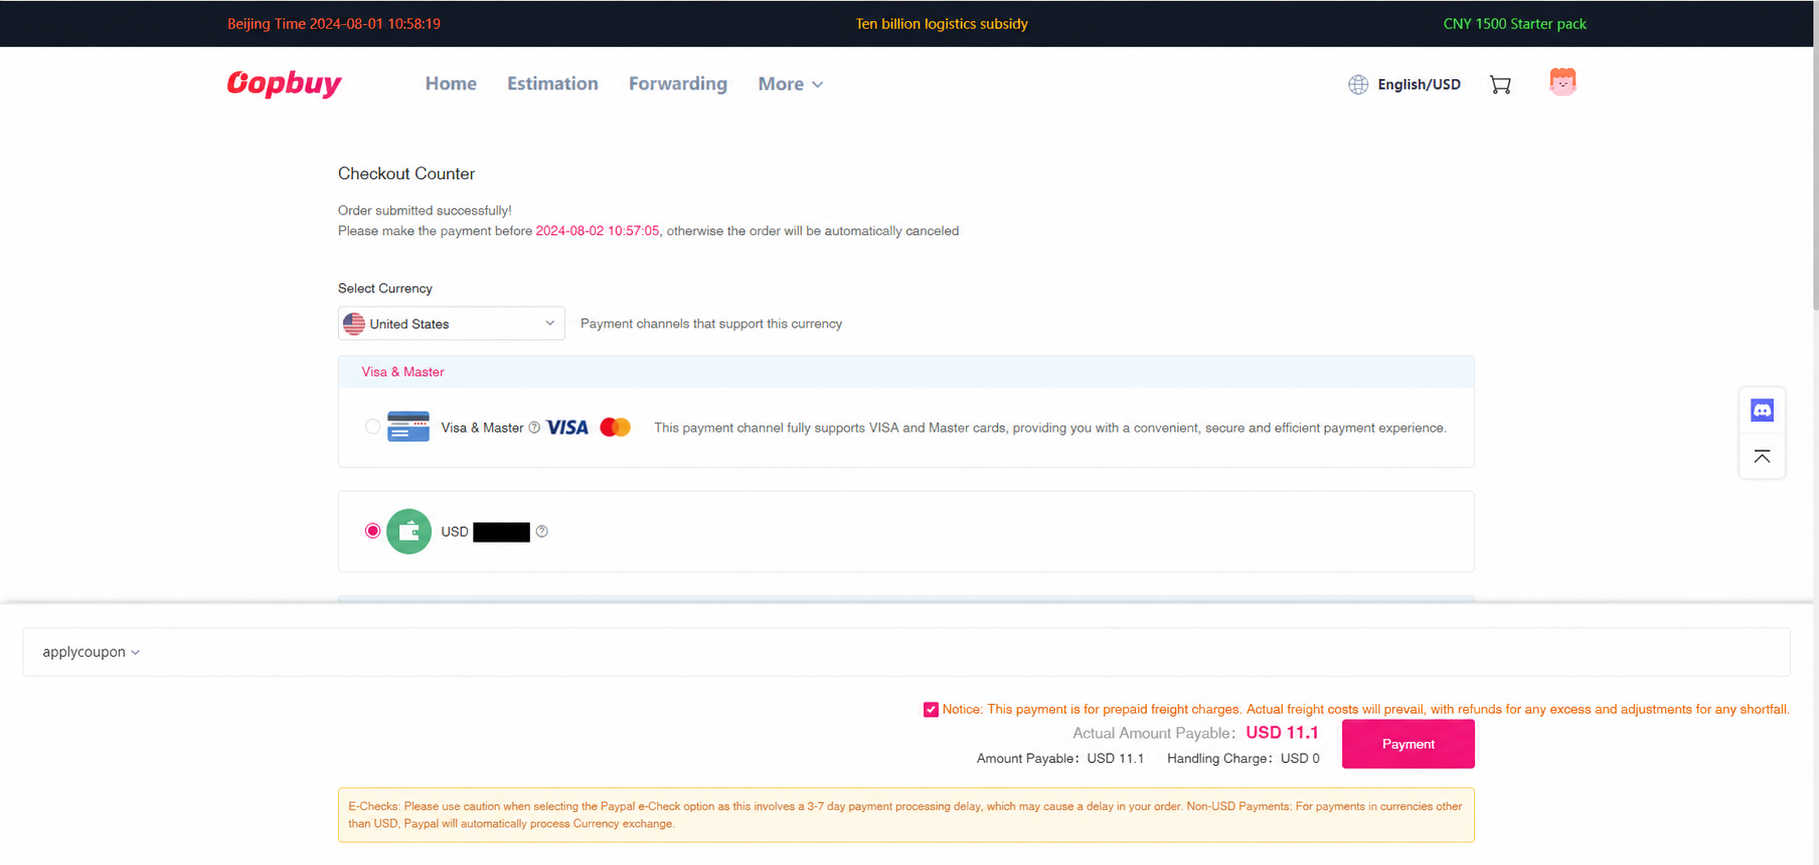
Skip to content
OopbuyFinds Spreadsheet UK buying guide

Oopbuy ordering guide: eleven steps, from sign-up to tracking

Follow one official tutorial sequence, then make each payment and warehouse decision with the current account details.

This follows the official 11-step tutorial, reviewed 18 October 2026. Its images show the 2024 interface, with private fields redacted where needed; some are resized instructional renditions. Example coupons and prices are not current offers.

1. Register an account

Use the official website and check the domain before entering credentials. Register with details you control and save the account confirmation. This catalogue does not create an agent account for you.
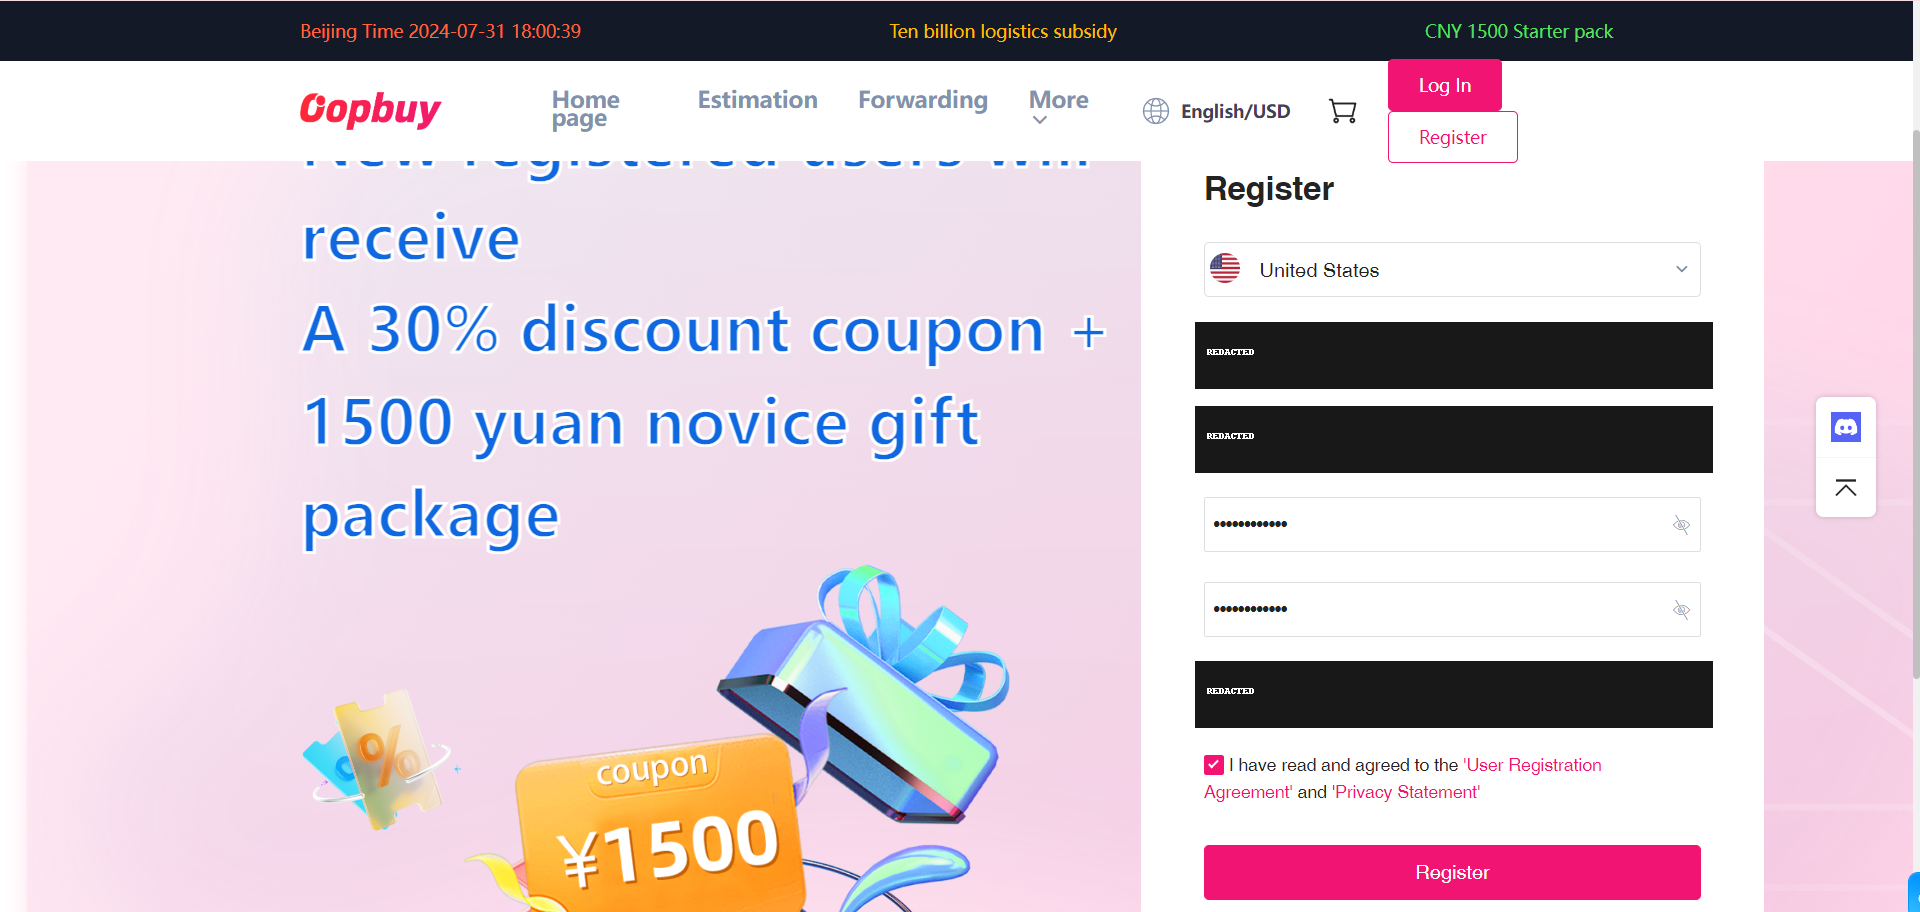
Registration form and account entry.
Registration form and account entry. Official 2024 tutorial interface; privacy-redacted where needed. Example figures and promotions are historical; current controls may differ. Open full size

2. Check available coupons

Open the account coupon area. Check the expiry, minimum spend, route and eligible charge before expecting a discount. The coupon in this tutorial is a historical example, not a benefit promised to new accounts.
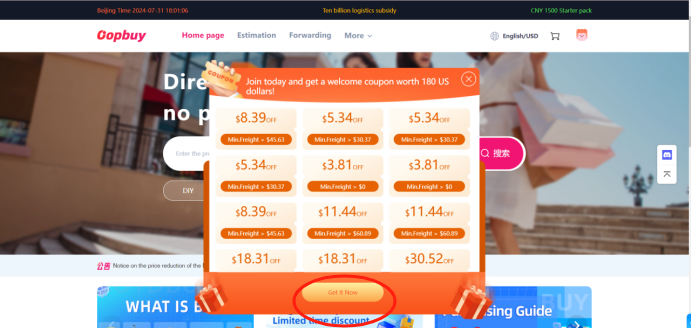
Coupon redemption and account coupon controls.
Coupon redemption and account coupon controls. Official 2024 tutorial interface; privacy-redacted where needed. Example figures and promotions are historical; current controls may differ. Open full size

3. Search for the seller link

Copy the original product URL from your chosen listing and paste it into the agent search. Check that the loaded shop and item match. If the link fails, ask support about that exact listing before substituting another.
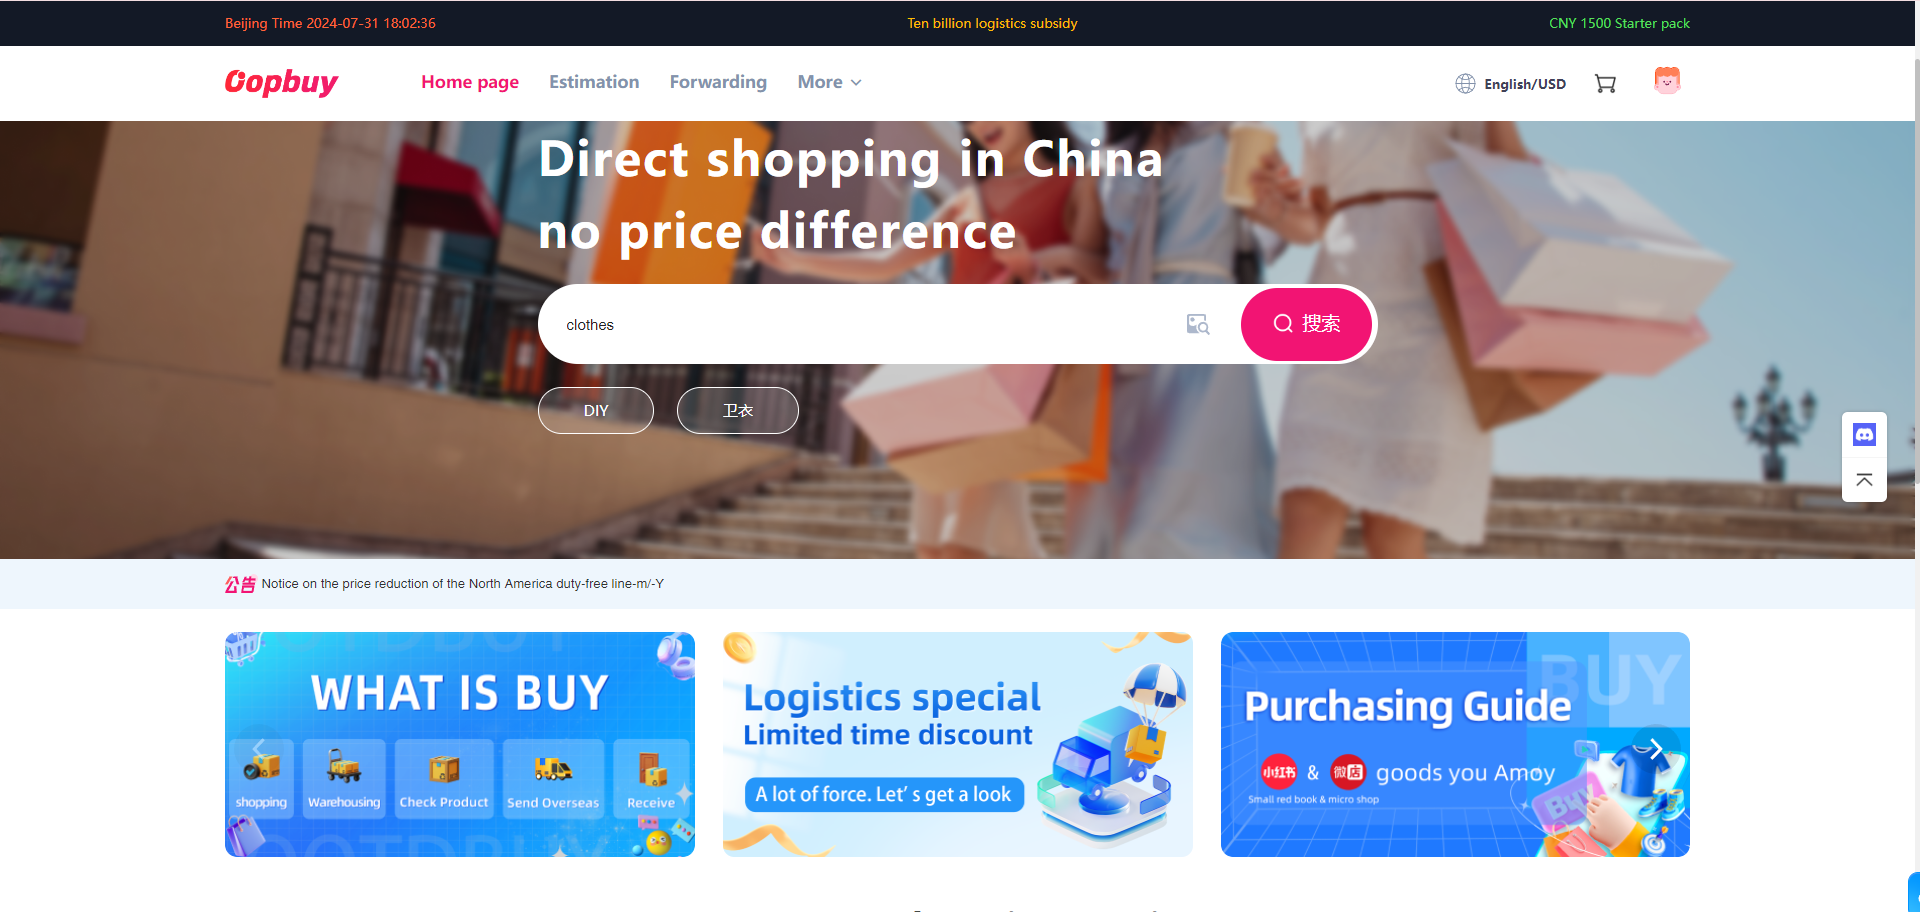
Product search field for a marketplace link.
Product search field for a marketplace link. Official 2024 tutorial interface; privacy-redacted where needed. Example figures and promotions are historical; current controls may differ. Open full size

4. Choose the variant

Select colour, size and quantity. Compare the size chart in centimetres with something you own and record any seller note. Save the variant details; similar thumbnails may represent different goods.
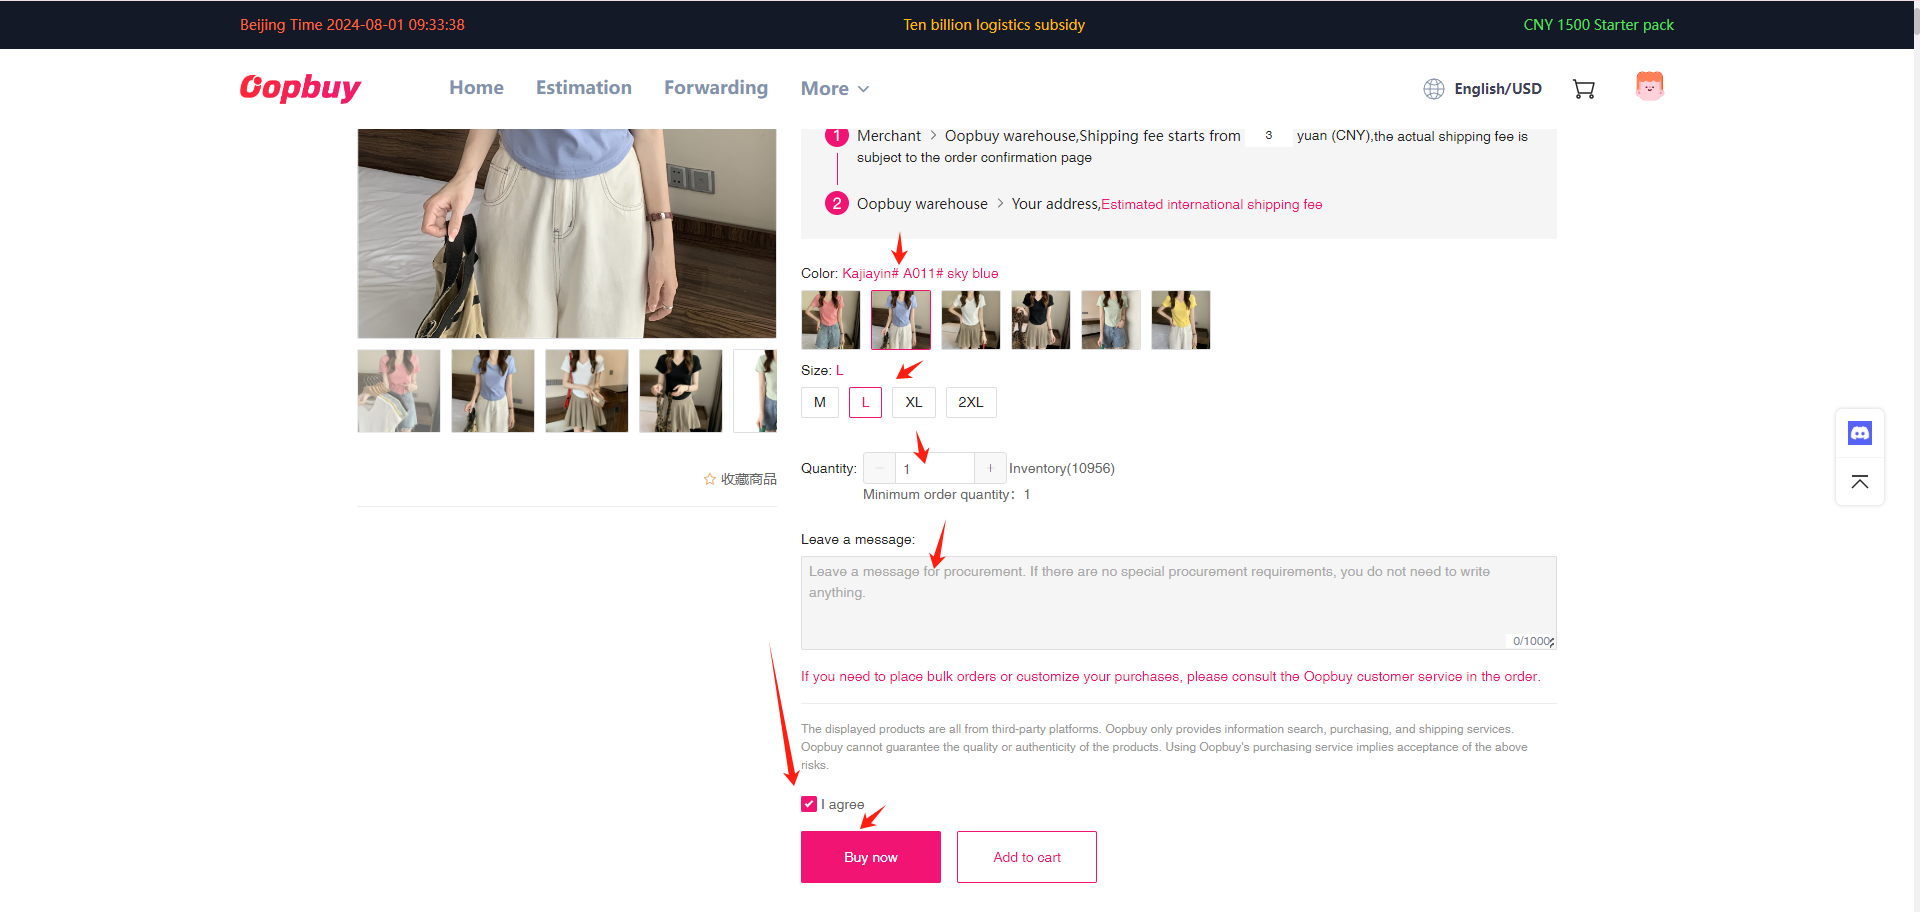
Size, colour and quantity selection on the item page.
Size, colour and quantity selection on the item page. Official 2024 tutorial interface; privacy-redacted where needed. Example figures and promotions are historical; current controls may differ. Open full size

5. Pay for the goods

Review the item cost and domestic postage, then the payment method and credited balance. This payment orders the item; it does not include the later international parcel by default. Keep your payment record.
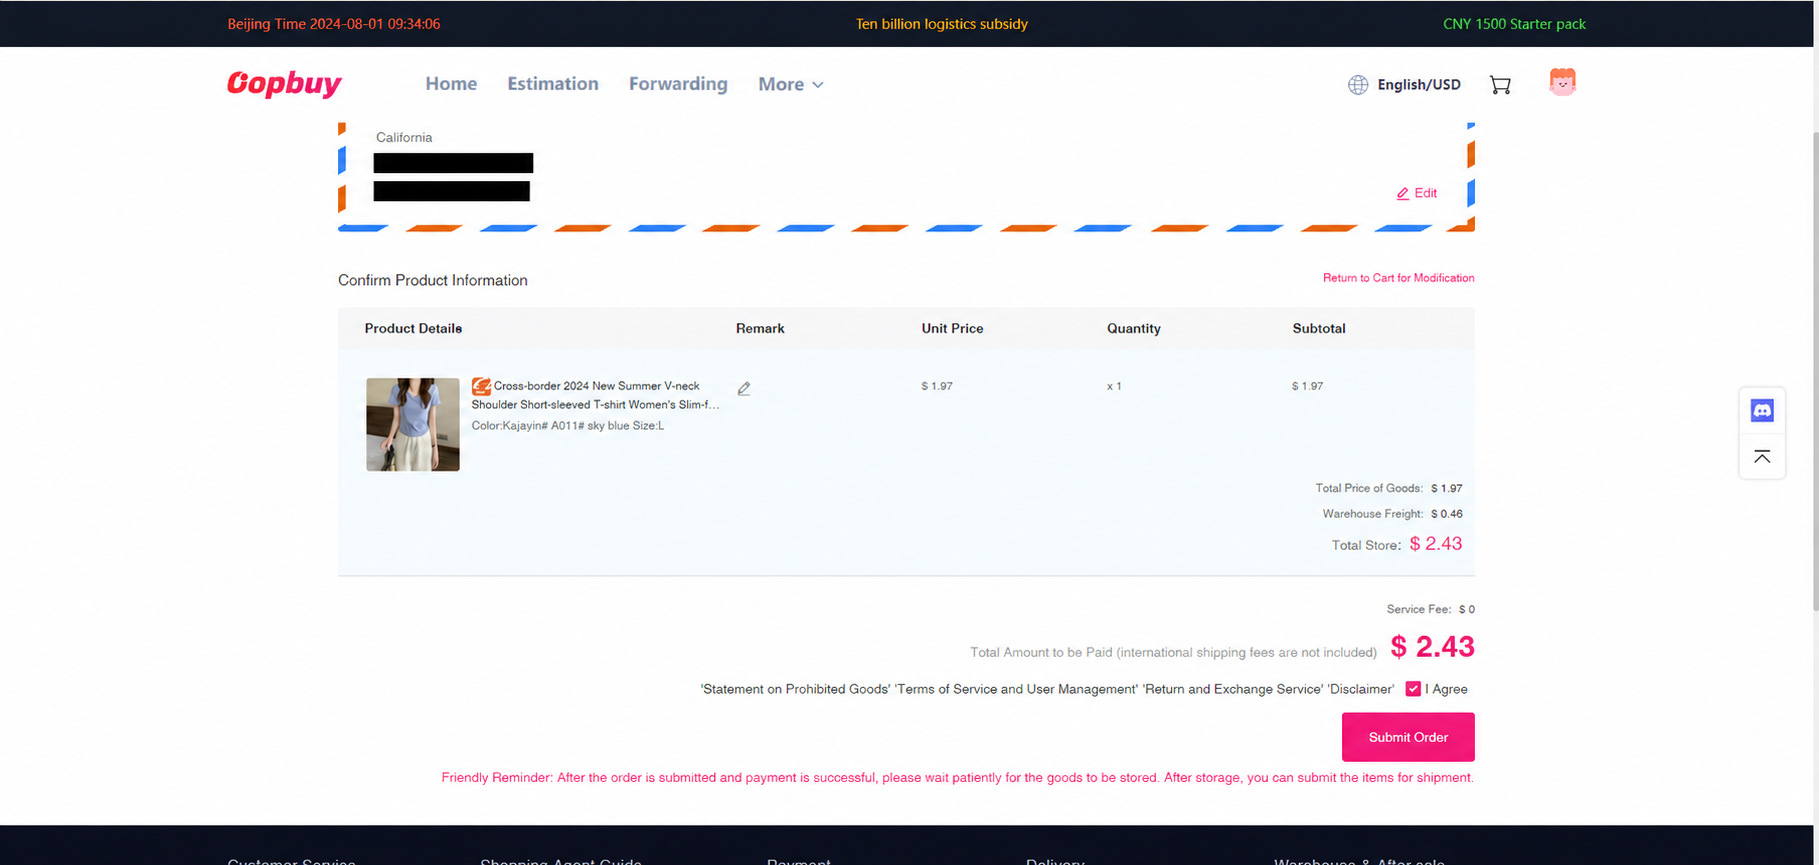
First payment: item order and payment confirmation.
First payment: item order and payment confirmation. Official 2024 tutorial interface; privacy-redacted where needed. Example figures and promotions are historical; current controls may differ. Open full size

6. Follow the order status

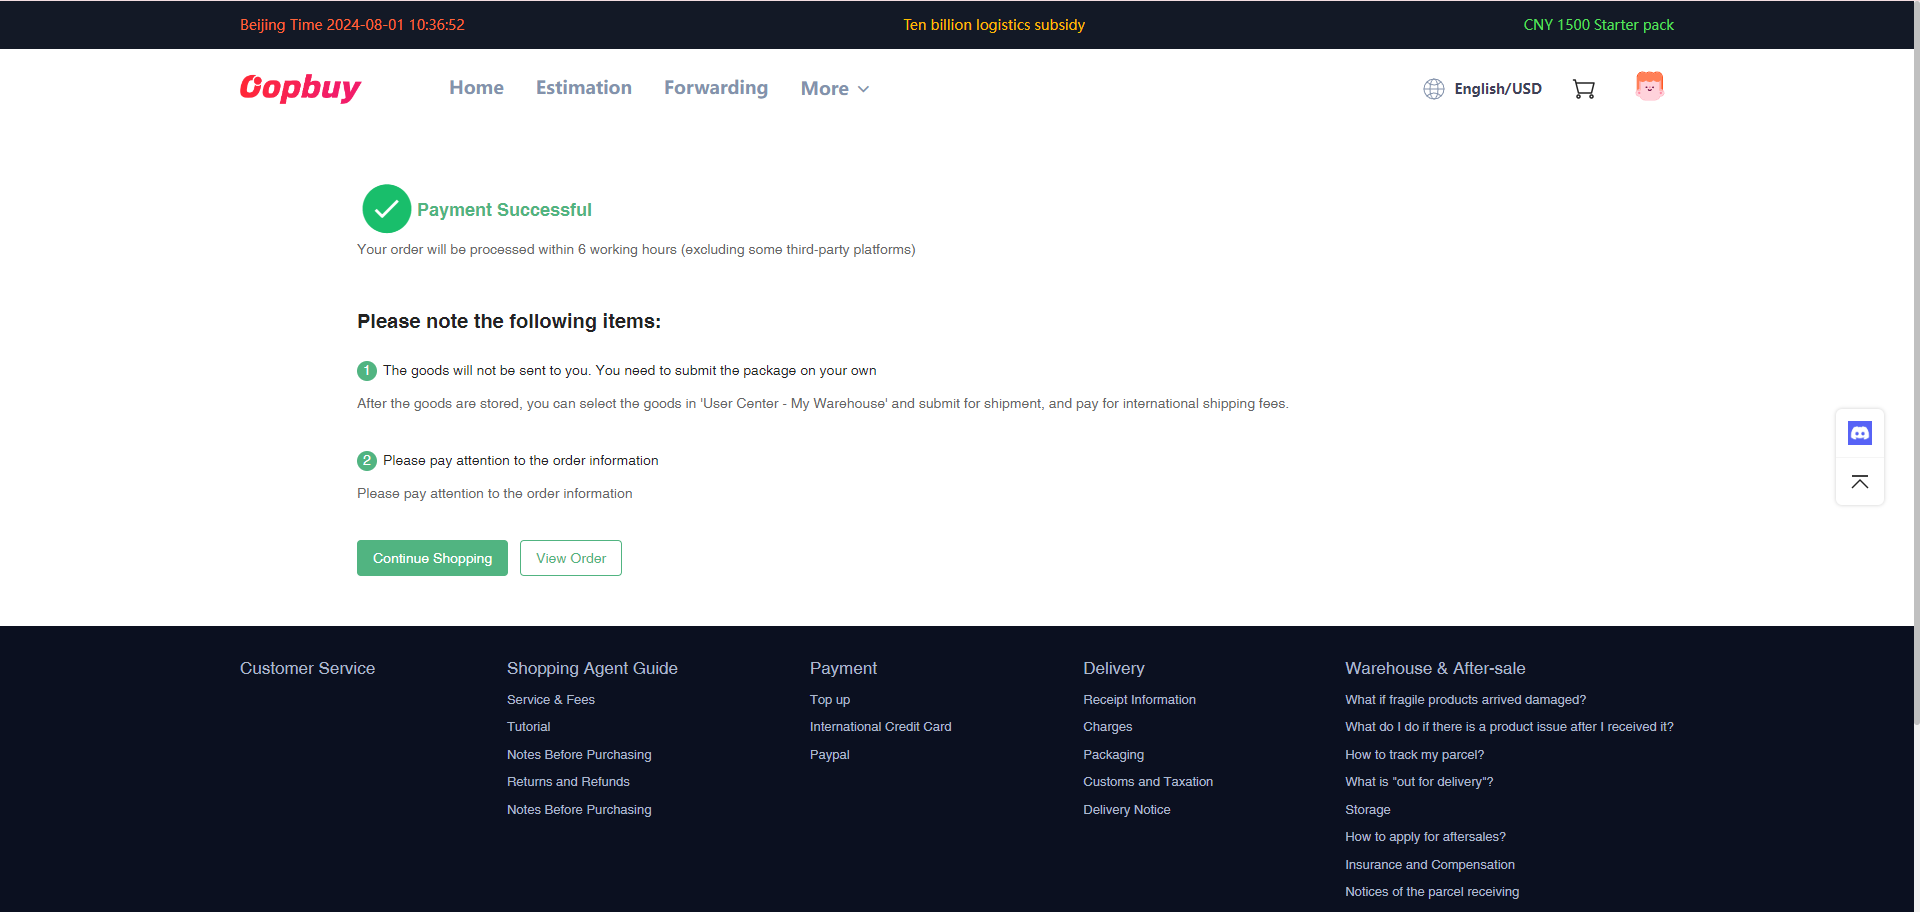
Use the order list to distinguish purchasing, seller dispatch and warehouse arrival. Contact support about unavailable variants or a seller delay. An item order number is not yet an international tracking number.
Order list and purchasing status.
Order list and purchasing status. Official 2024 tutorial interface; privacy-redacted where needed. Example figures and promotions are historical; current controls may differ. Open full size

7. Review the warehouse item

Open stored goods, inspect the available photos and request missing views or measurements. Resolve any return request before the conditional seller deadline. The car thumbnail in this old tutorial is a placeholder, not a QC example.
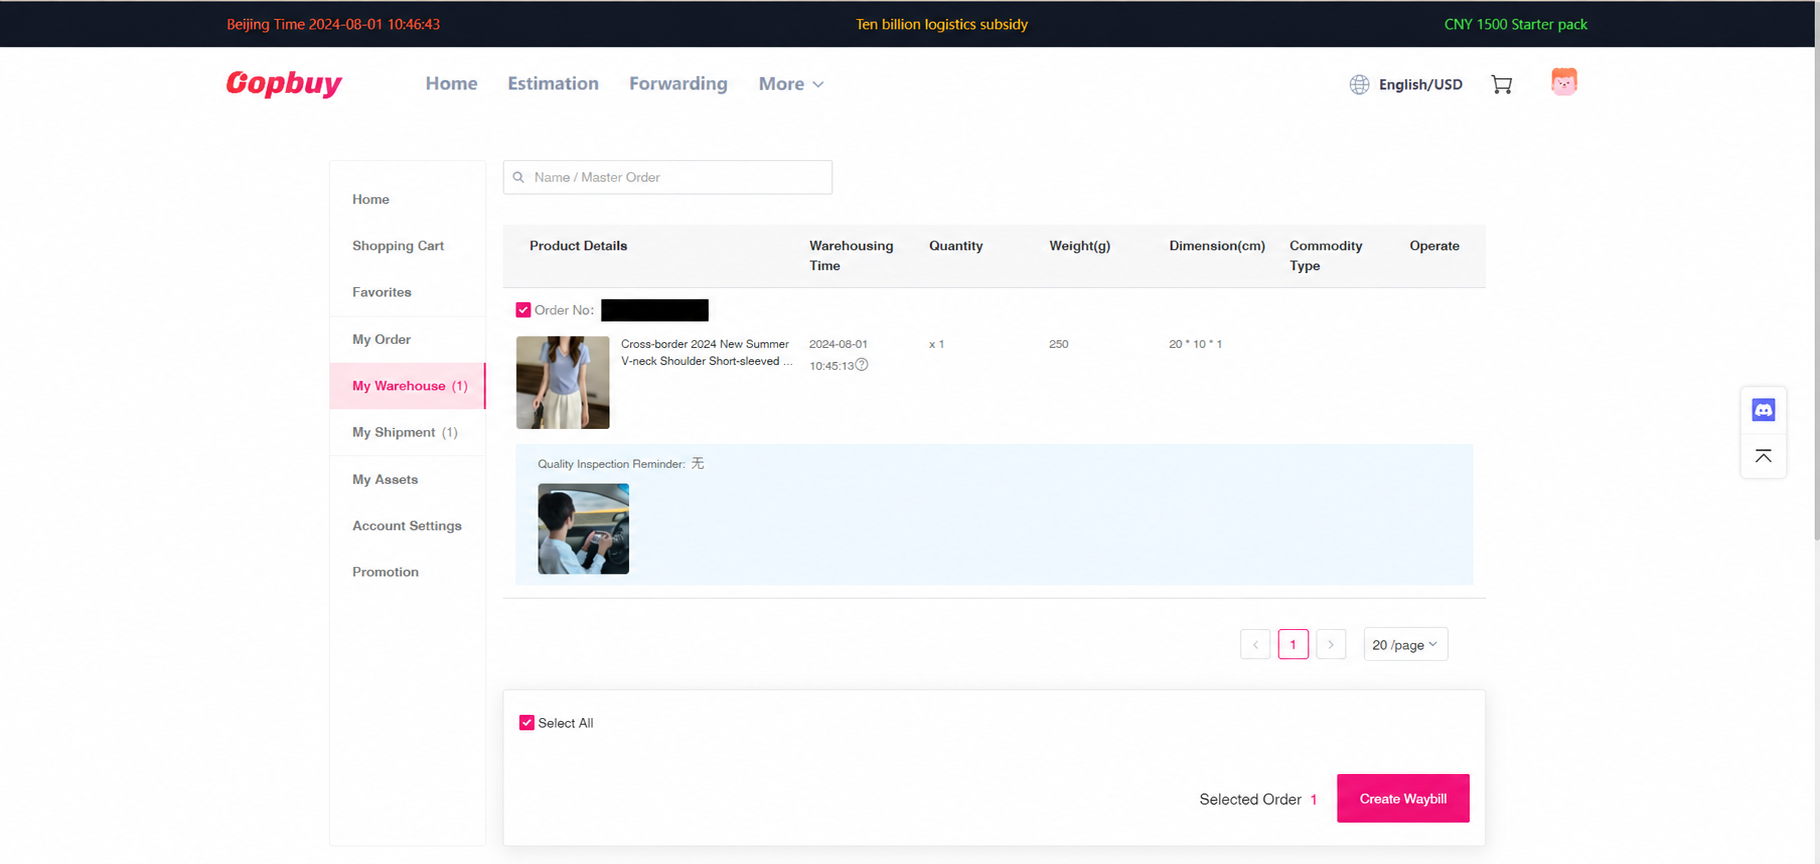
Warehouse list where accepted goods are selected for a parcel.
Warehouse list where accepted goods are selected for a parcel. Official 2024 tutorial interface; privacy-redacted where needed. Example figures and promotions are historical; current controls may differ. Open full size

8. Submit the waybill

Select accepted items, enter the exact destination address and choose packing, declaration and a compatible route. Check postcode and restricted contents; a saved address does not prove every line accepts it. Declare accurately and review optional services.
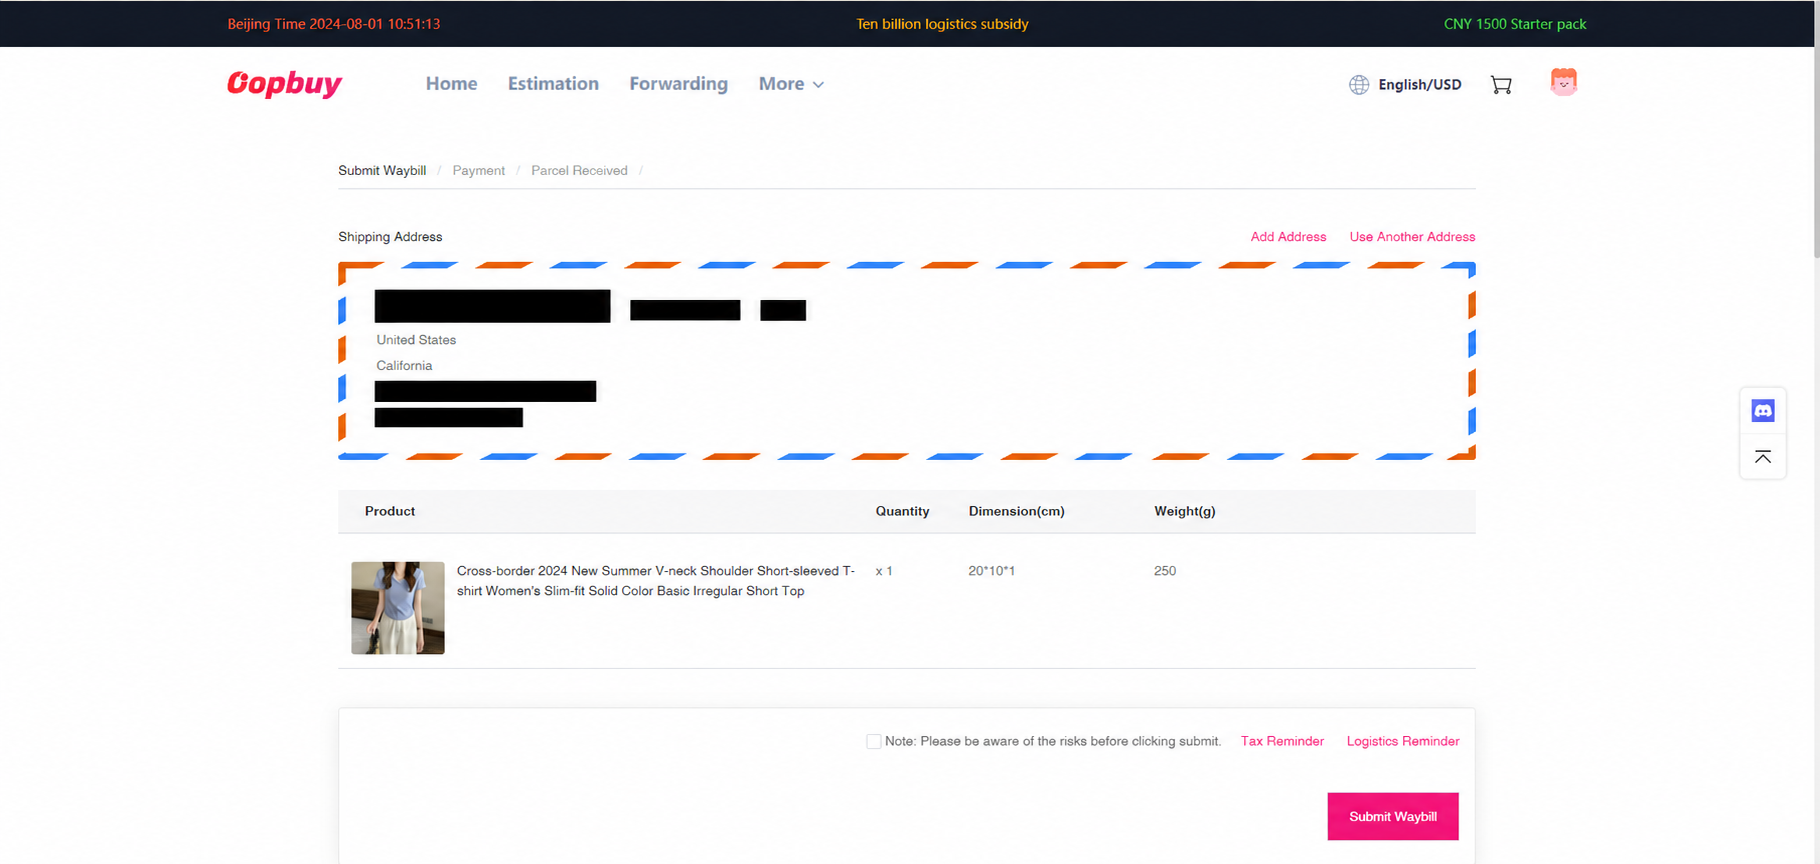
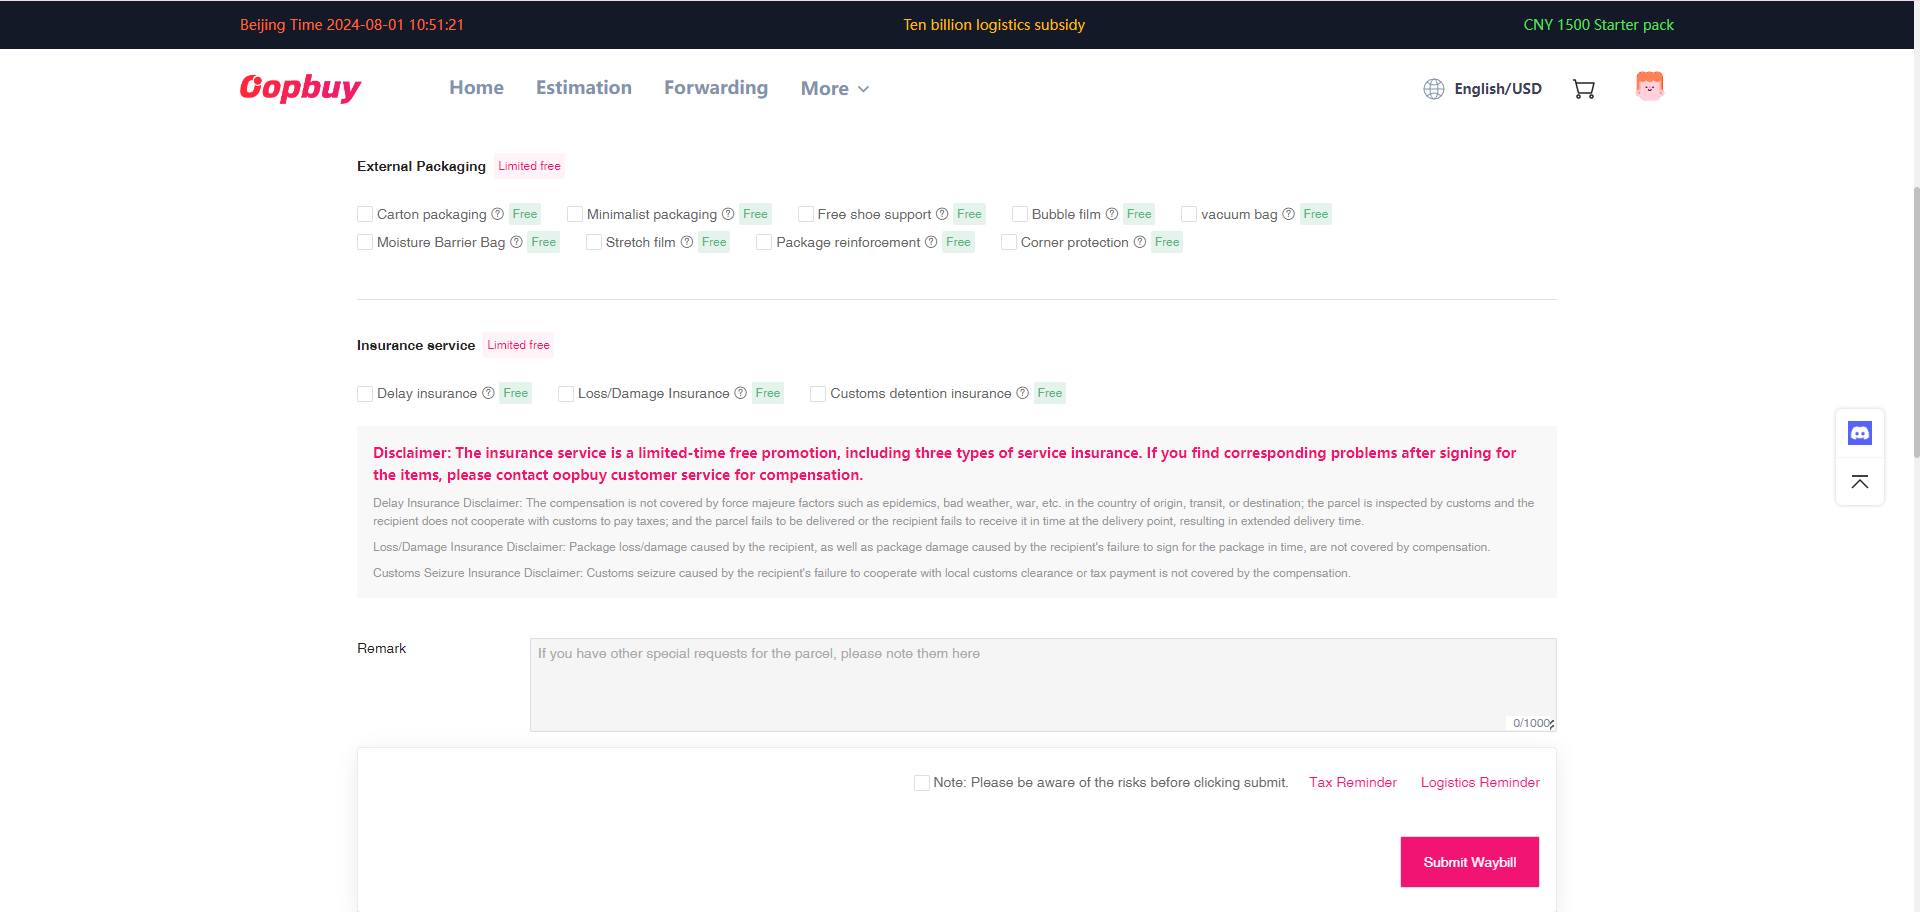
Waybill screens: address, packing, declaration and logistics choices. View 1 of 3.
Waybill screens: address, packing, declaration and logistics choices. View 1 of 3. Official 2024 tutorial interface; privacy-redacted where needed. Example figures and promotions are historical; current controls may differ. Open full size
Waybill screens: address, packing, declaration and logistics choices. View 2 of 3.
Waybill screens: address, packing, declaration and logistics choices. View 2 of 3. Official 2024 tutorial interface; privacy-redacted where needed. Example figures and promotions are historical; current controls may differ. Open full size
Waybill screens: address, packing, declaration and logistics choices. View 3 of 3.
Waybill screens: address, packing, declaration and logistics choices. View 3 of 3. Official 2024 tutorial interface; privacy-redacted where needed. Example figures and promotions are historical; current controls may differ. Open full size

9. Pay the estimated freight

Read the selected route’s charge and what is still estimated. Compare scale and volumetric weight and confirm extra services. The initial freight amount may change after packing; do not treat a tutorial total as a quote.
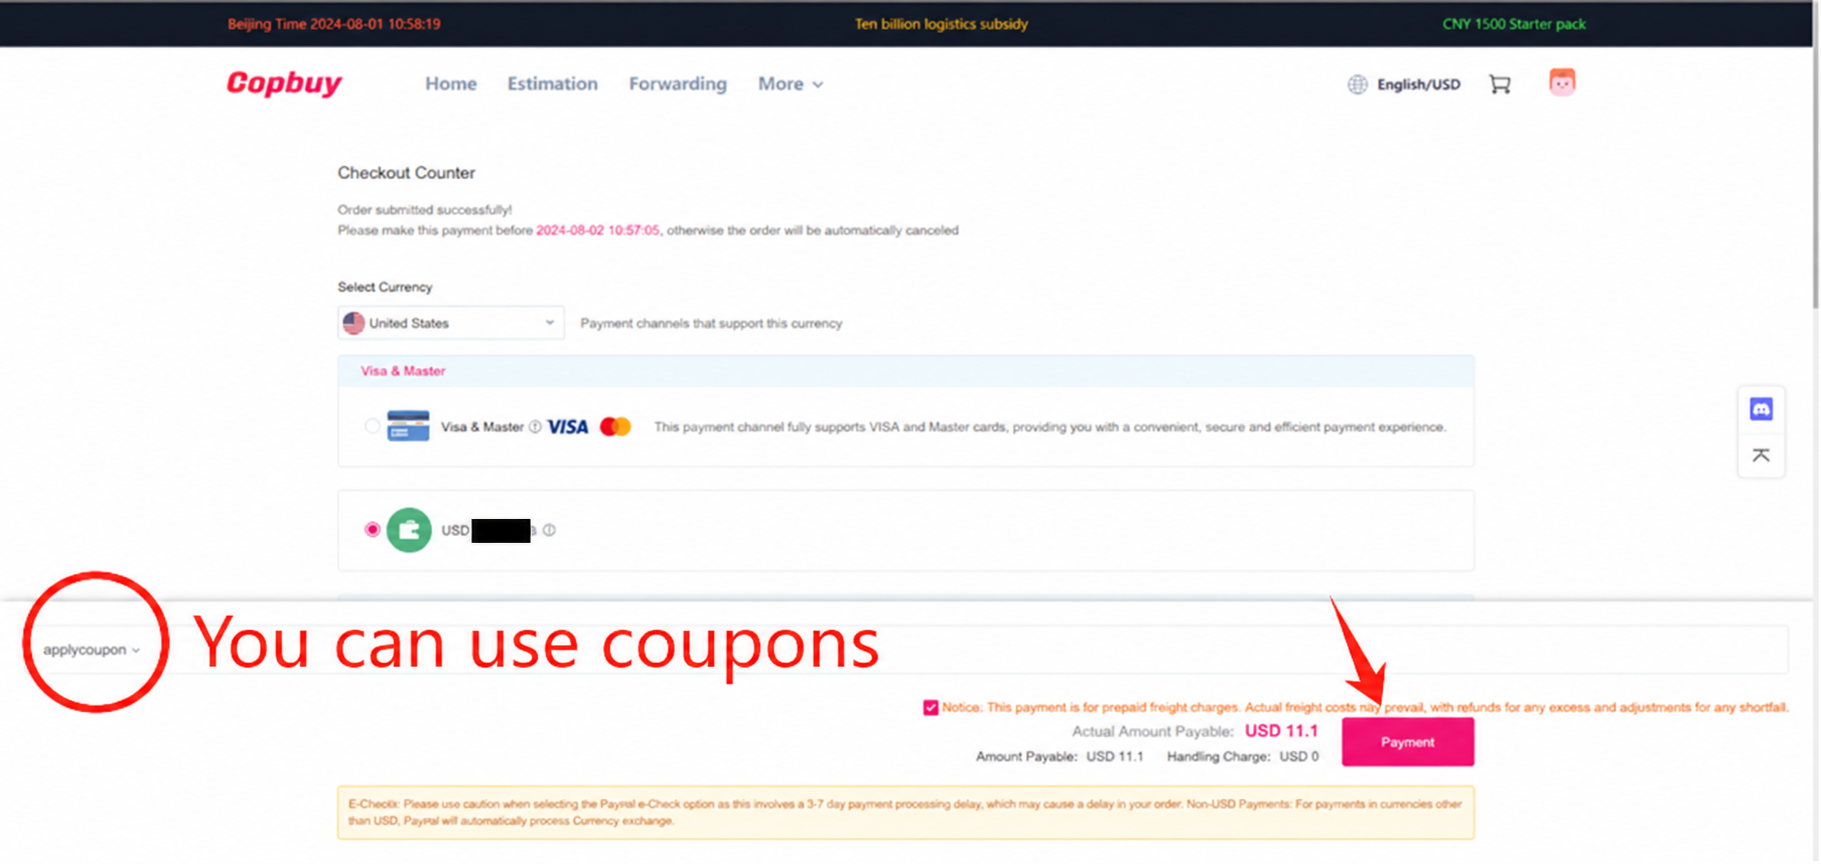
Estimated freight payment for the submitted parcel.
Estimated freight payment for the submitted parcel. Official 2024 tutorial interface; privacy-redacted where needed. Example figures and promotions are historical; current controls may differ. Open full size

10. Review the settlement

Check the packed parcel and settlement record for any additional charge or refund. Reconcile it with your earlier freight payment. The tutorial’s car thumbnail is illustrative and does not show warehouse inspection results.
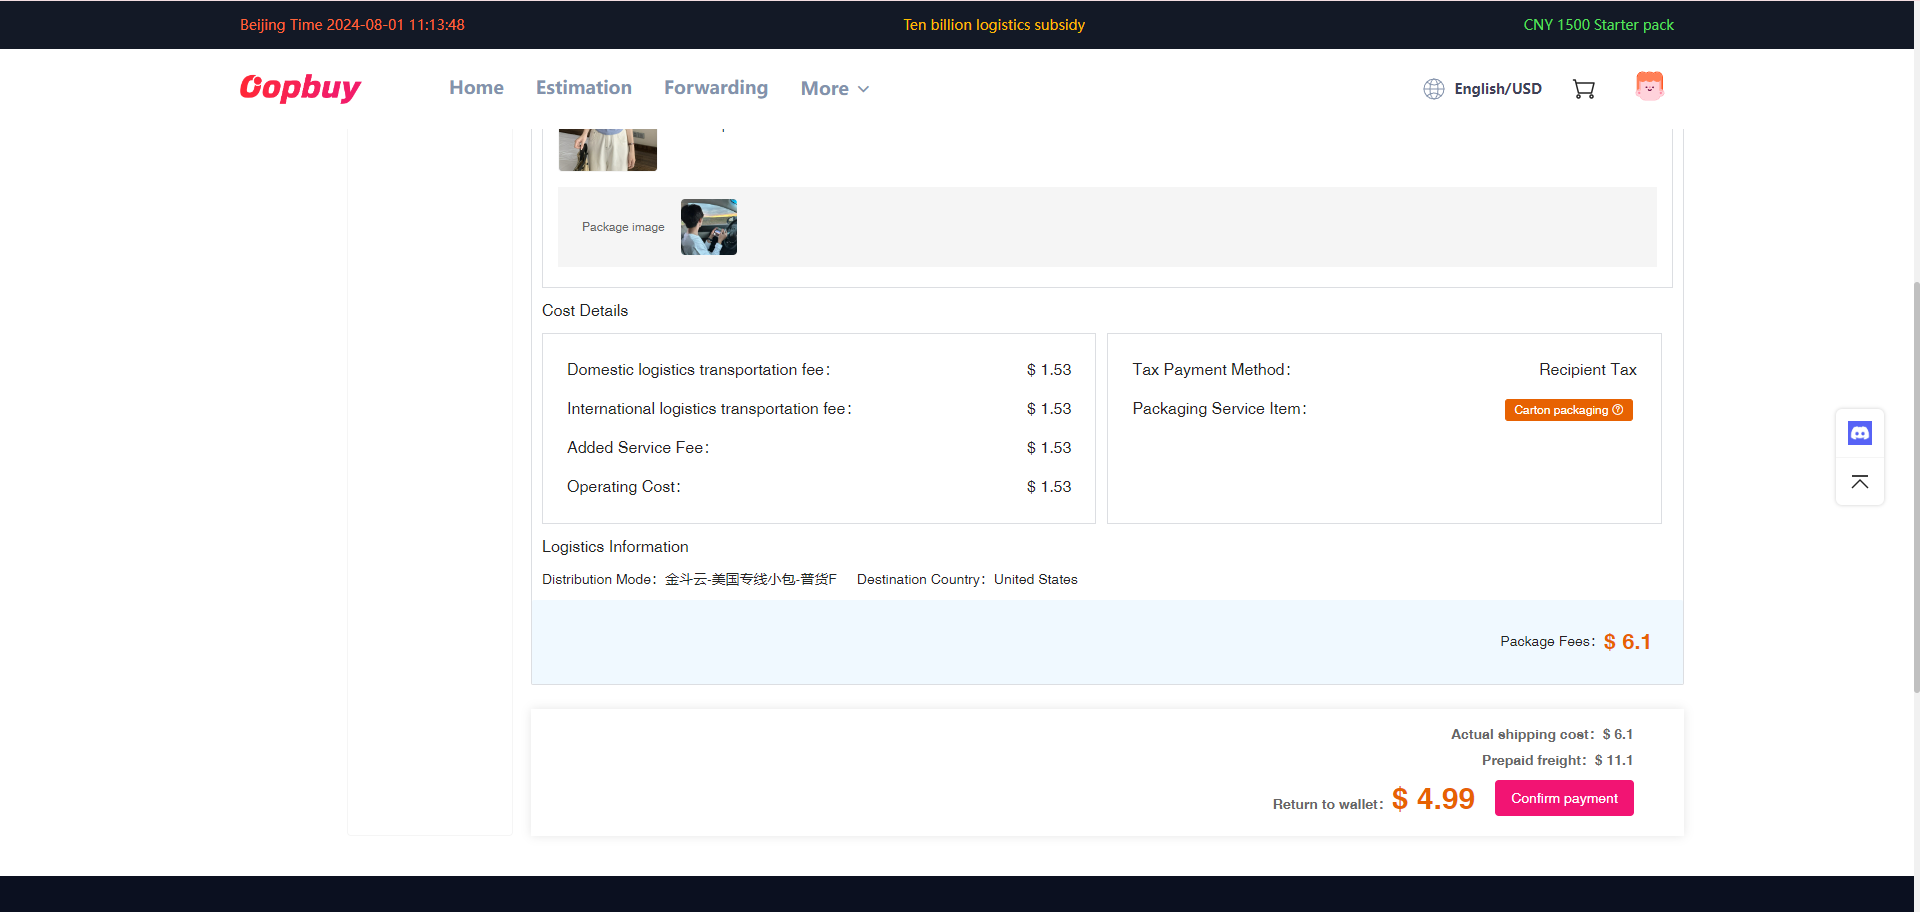
Parcel settlement after packing and weighing.
Parcel settlement after packing and weighing. Official 2024 tutorial interface; privacy-redacted where needed. Example figures and promotions are historical; current controls may differ. Open full size

11. Track and receive

Open the parcel tracking link. Count transit from dispatch and distinguish a label created from a carrier scan. At delivery, inspect packaging, retain evidence and contact the carrier and agent promptly if anything is missing or damaged.
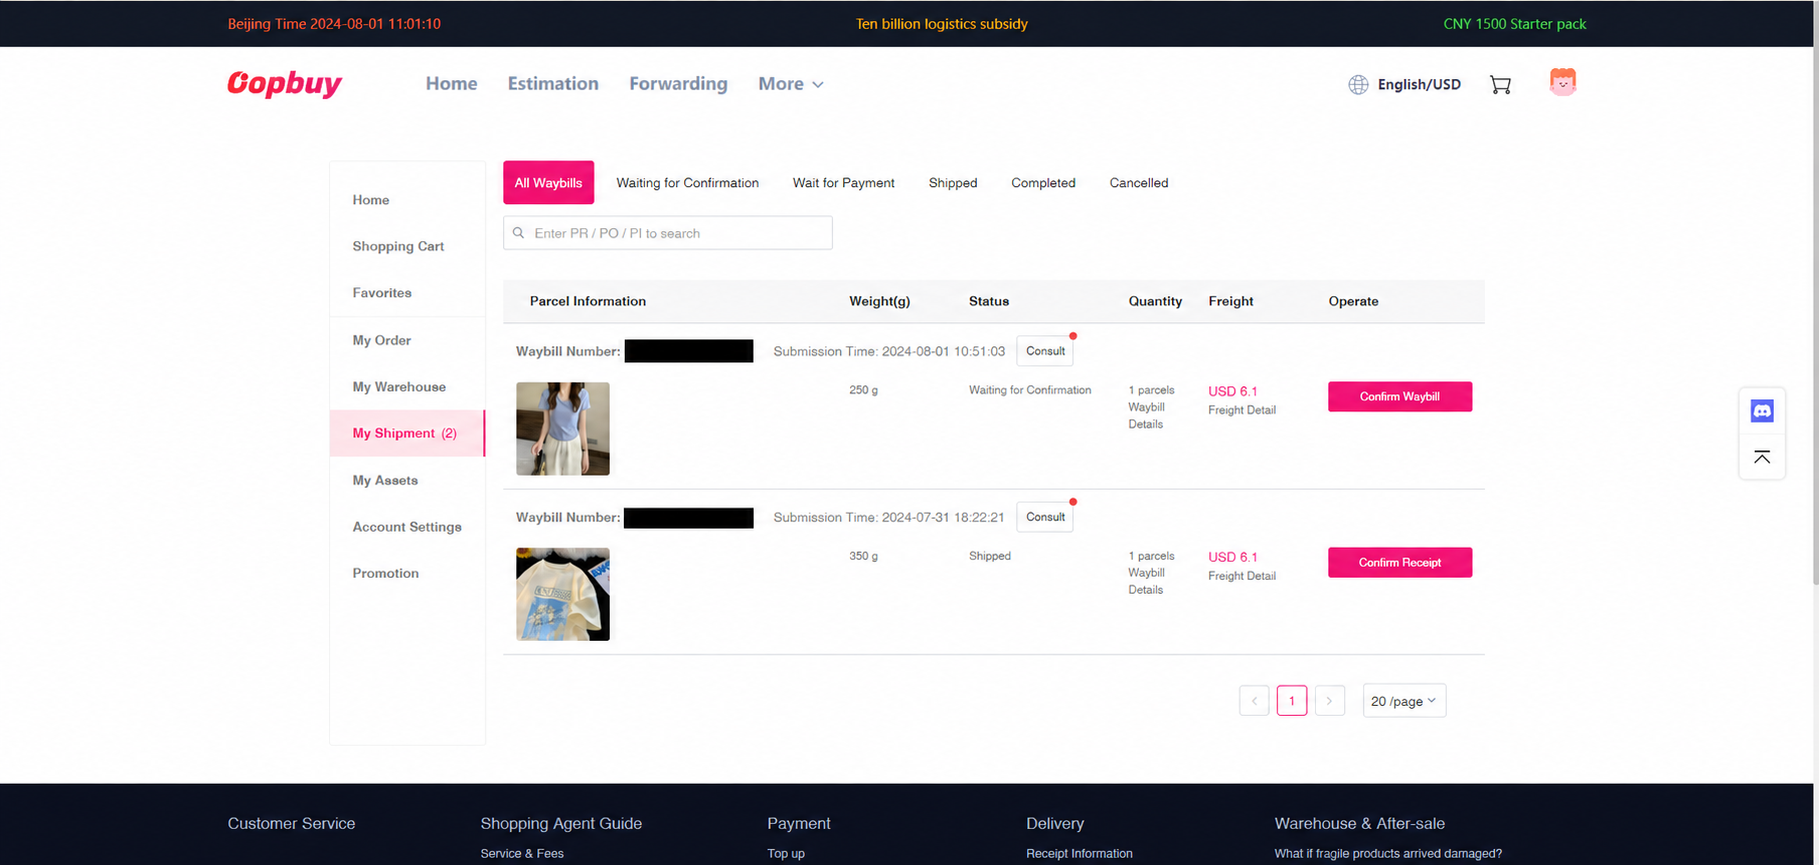
International parcel list and tracking entry.
International parcel list and tracking entry. Official 2024 tutorial interface; privacy-redacted where needed. Example figures and promotions are historical; current controls may differ. Open full size